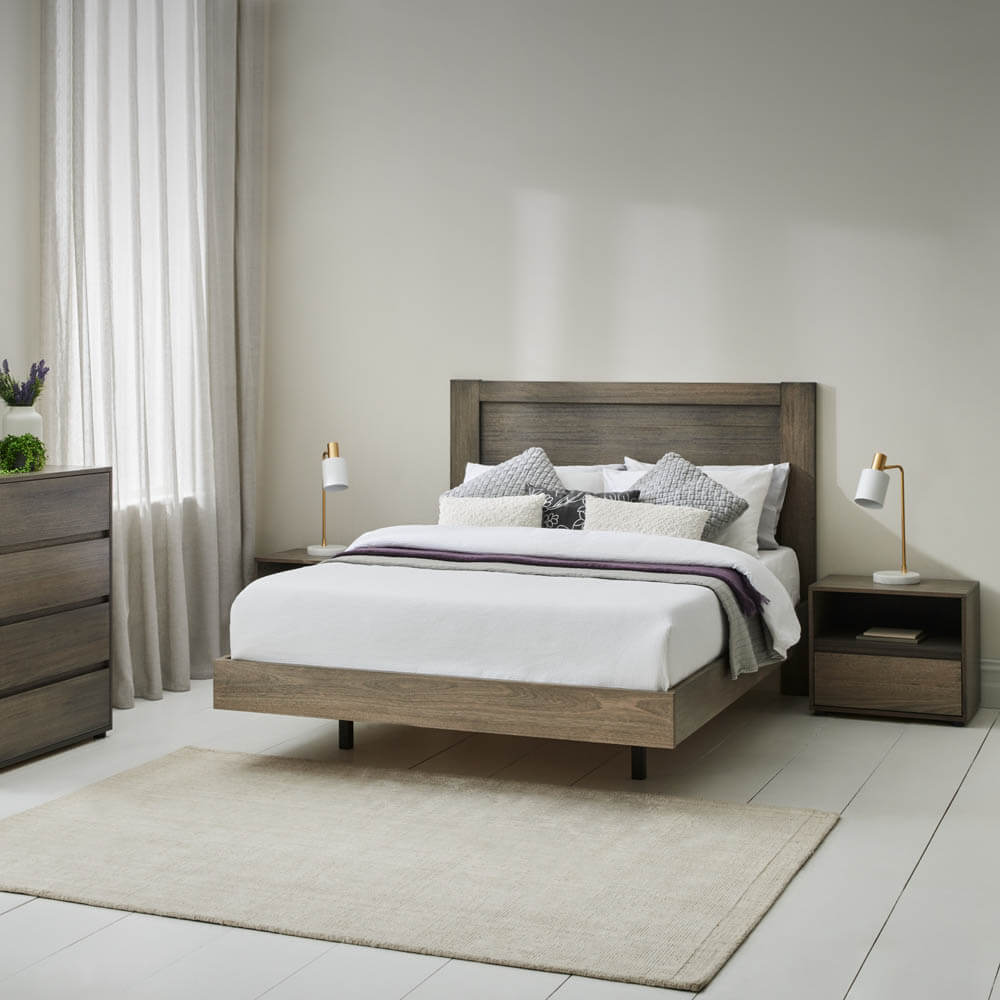
Step into a world of relaxation with the Yarra Floating King Base with Tasmanian Oak Veneer Bedhead at the helm.
Made to order and locally handcrafted with the finest Tasmanian Oak Veneer, customize your sleep experience with a mix-and-match of headboards, bases - in a snap! So lay your head to rest and feel like you're floating off into dreamland!
Mattress and accessories sold separately.
Headboard
Queen - H: 1290mm x W: 1630mm x L: 2145mm
King - H: 12900 x W: 2160mm x L: 2145mm
Footend
Height - floor to top of footend 405mm
Height - Floor to bottom of footend 225mm
This products comes full set of assembly instructions.
Assembly Difficulty Rating Moderate no additional tools required.
Hardware Pack: containing - 12x (M4) 10mm button head bolts; 2x 38mm screws; 1x allen key
*NOTE: The hardware pack may contain more items than required. Please contact our team if you have any questions/concerns.
STEP 1 – Position Bed Head and Side Rails approximately where your bed is to be set up. Connect the Side Rails to the Bed Head by hooking the Side Rail brackets onto the Head brackets.
STEP 2 – Screw three button head bolts (M4) into the position shown to connect the Side Rails to the Bed Head and tighten (finger tight only).
Having trouble? See *Helpful Tips* at the end of this document.
STEP 3 – Complete the above process on the other Side Rail, then repeat with the Foot Panel.
Having trouble? See *Helpful Tips* at the end of this document.
STEP 4 – Ensure that the bed is sitting square and then tighten all button head bolts using the allen key. Once snug, tighten only with ¼ turn of the Allen Key. DO NOT USE powered drills as over-tightening can cause foot end rail to bow. Your bed should now look like the following diagram.
STEP 5 – To set up the slat and spine system, proceed to the instructions titles “Amendment to instructions for all SilverLynx beds”. Note the 2x 38mm screws provided in the hardware pack can be used in this section of the assembly.
GENERAL Make sure not to tighten bolts before attaching all components and making sure they sit square. Once you are ready, make sure all bolts are snug, then tighten only with ¼ turn of the Allen Key. DO NOT USE powered drills as over-tightening can cause components to bow. Never force bolts if you can feel resistance as this can cause the thread to strip. Try to adjust the hole alignment until your bolt can connect easily by hand.
Never drag or move assembled bed as this may damage the bed
This product is available on display at the following OMF stores
ACT - Fyshwick
NSW
Crossroads,
Rutherford,
Warrawong
QLD
Helensvale,
Ipswich,
Morayfield,
North Lakes
Your Yarra bed is crafted with care. Properly maintained, it will mature overtime developing a rich patina enhancing its appearance. To get the best performance from your Yarra bed, please follow these simple care instructions:
- Do not use silicone based polishes/cleaners at any time.
- Dust surfaces gently with a feather duster then wipe gently with a slightly damp cloth/chamois.
- Do not allow liquids, damp clothes to remain in contact with lacquered surface for extended periods.
- Never place furniture in close proximity to heating outlets.
- Exposure to direct sunlight will cause colour fading to fabrics, leathers and timber finishes.
- Do not allow solvents, abrasives or heated objects to come in contact with the suite.
- Do not use cordless drivers or power drills to tighten your bed brackets, as over-tightening can cause the foot end rail to bow.
- Periodically rotate the bed slats,
- Check the positioning of the support leg and ensure bracket bolts are tights.


